Easy steps to complete your EN 9102 FAI report:

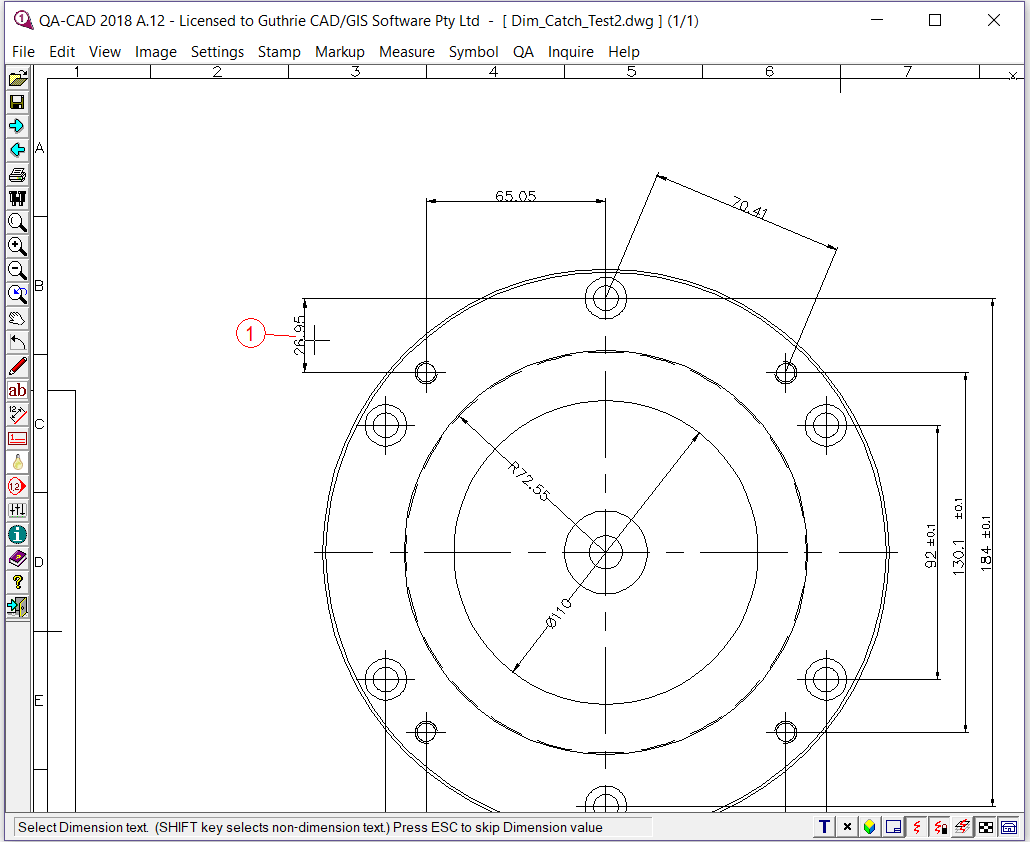
Step 1: Open your drawing on QA-CAD software. Select File in the menu bar and click Open. Then choose a drawing file (DWG, DXF, PDF, etc.) that you would like to balloon (In this example, Dim_Catch_Test2.dwg). Then press Open.

Step 2: If you want to see the drawing with black lines on a white background. Press three toggle buttons at the bottom-right of the software window (as you can see three red rectangles in the below example image). If not, please skip this step.

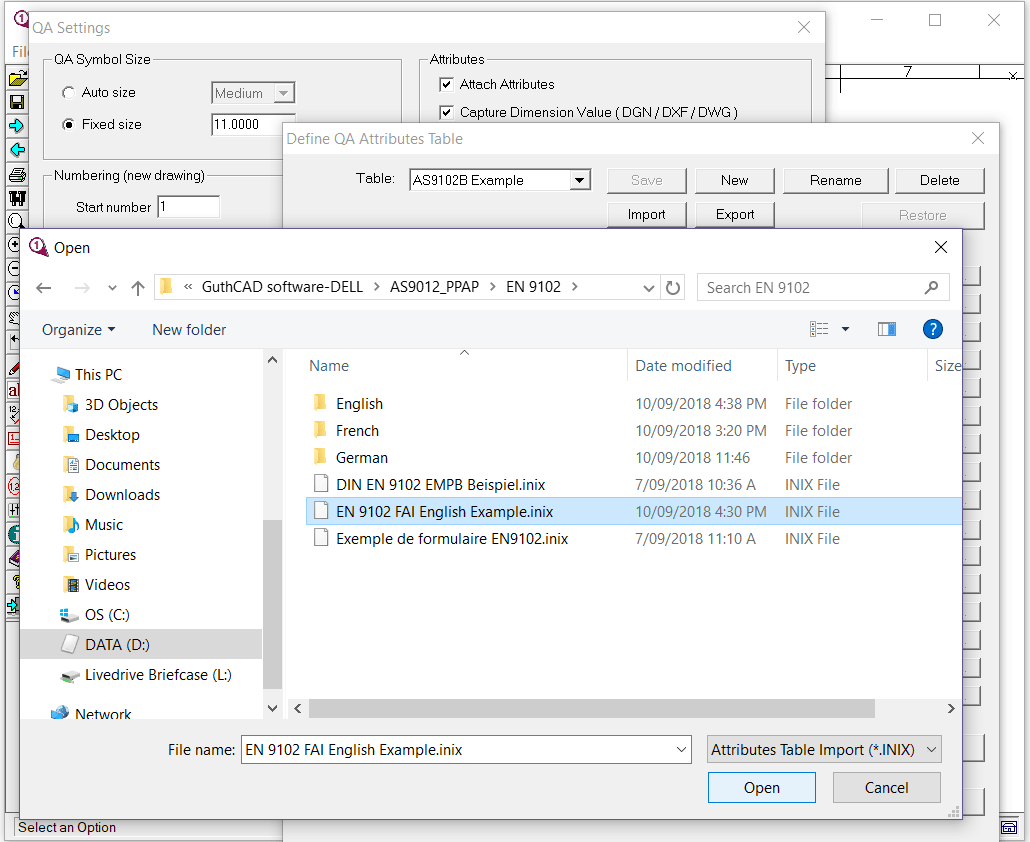
Step 3: Select QA in the menu bar and click 'QA Settings'. A QA settings window opens. Click * button. Then a Define QA Attributes Table window opens. Press the Import button and select an EN 9102 FAI English example inix.file. Press Open button.
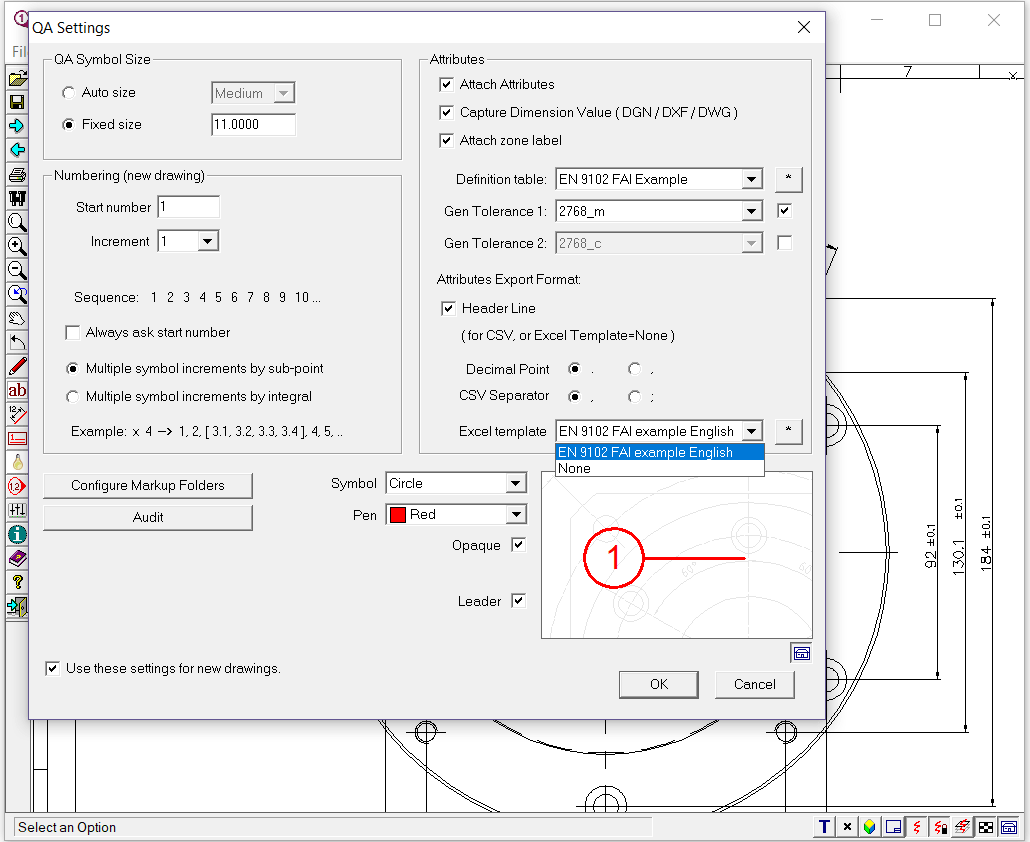
Step 4: Select the EN 9102 FAI example as an EXCEL template. Press OK button.
Step 5: Click 'Set View/Zones' from QA menu. Then adjust rows, columns and coordinate to match the software coordinates to the drawing size.

Step 6: Now click 'Add QA symbols' from QA menu. Then ’QA Start number/ increment‘ window pops up, press OK button..

Step 7: Move a mouse pointer to where you want to place a balloon (bubble) and left-click.

Step 8: Then move the pointer to a number you want to capture and left-click again.
Step 9: After that, 'Add/ Edit QA symbol attributes' window pops up. You can see the number you selected is inserted in the attributes table.

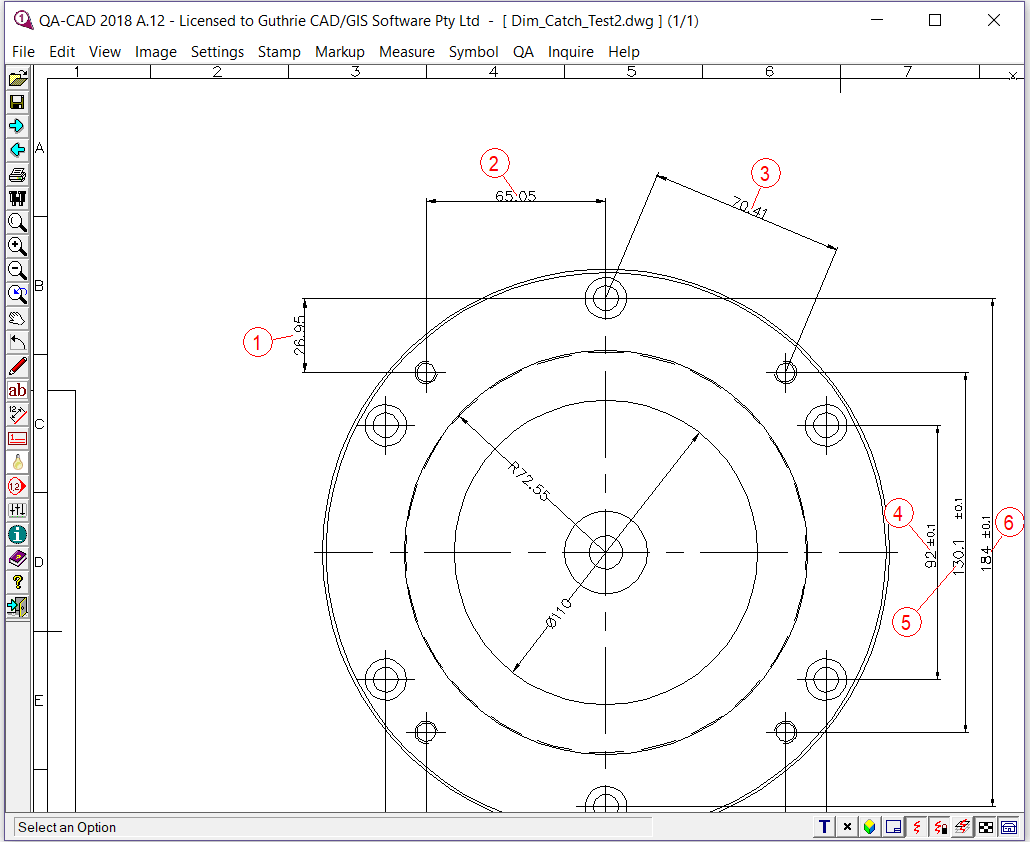
Step 10: You just need to repeat this operation to finish drawing all the balloons you need.
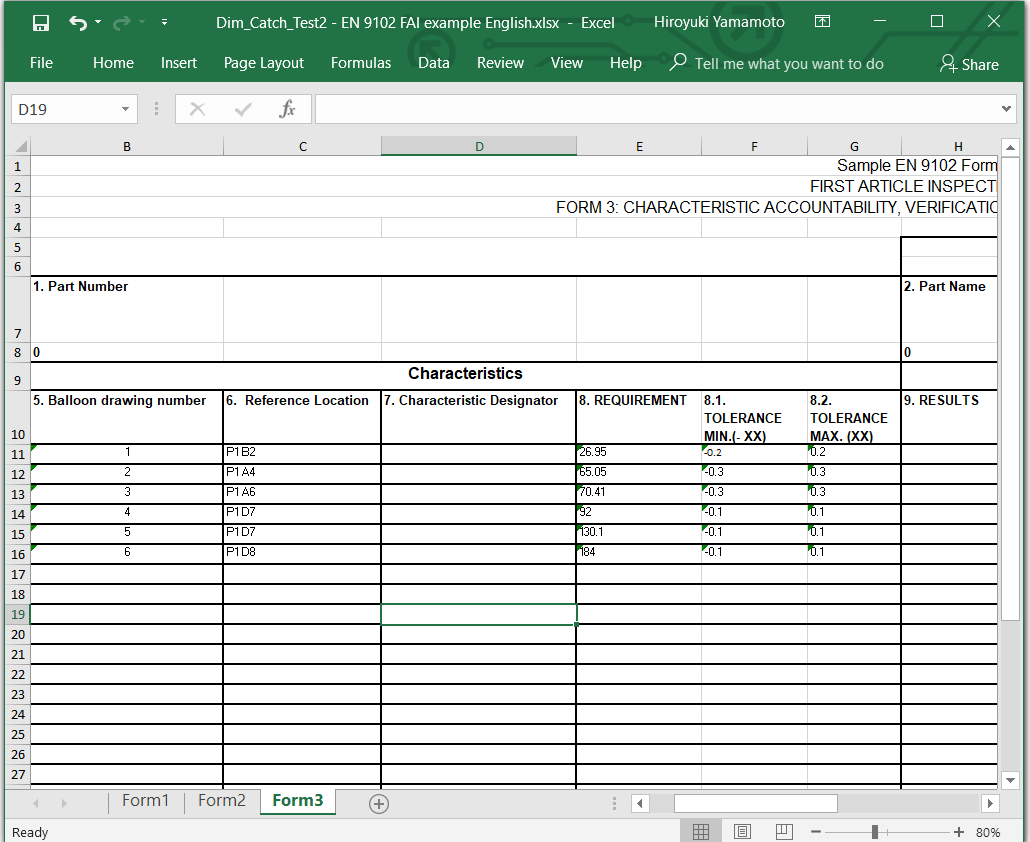
Step 11: Export embedded data to the sample EN 9102 EXCEL form. Now choose 'Export Attributes' from QA menu. Then select an EN 9102 FAI EXCEL template file this time. As you can see, all captured values in the balloons are exported to the EN 9102 FAI Form3 template.
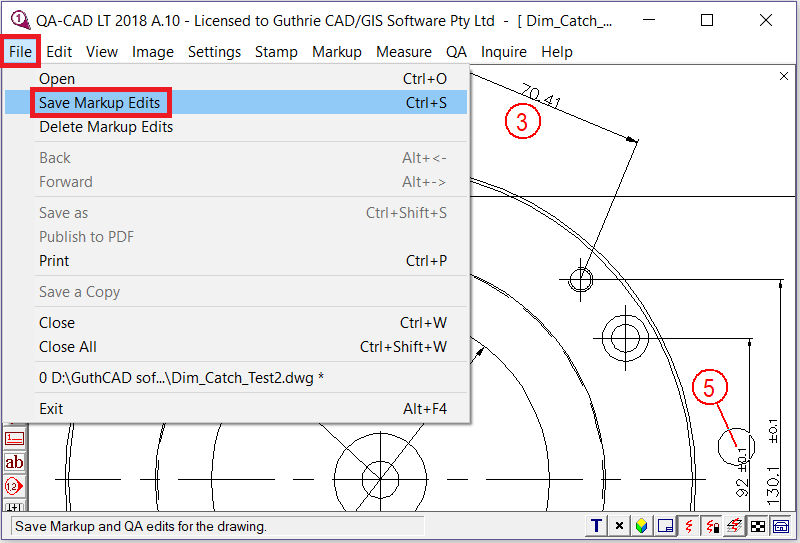
Step 12: When you want to save the ballooned drawing as a working drawing, select File and click Save Markup Edits. Next time you open your drawing, you can add, delete or edit the balloons on the drawing.
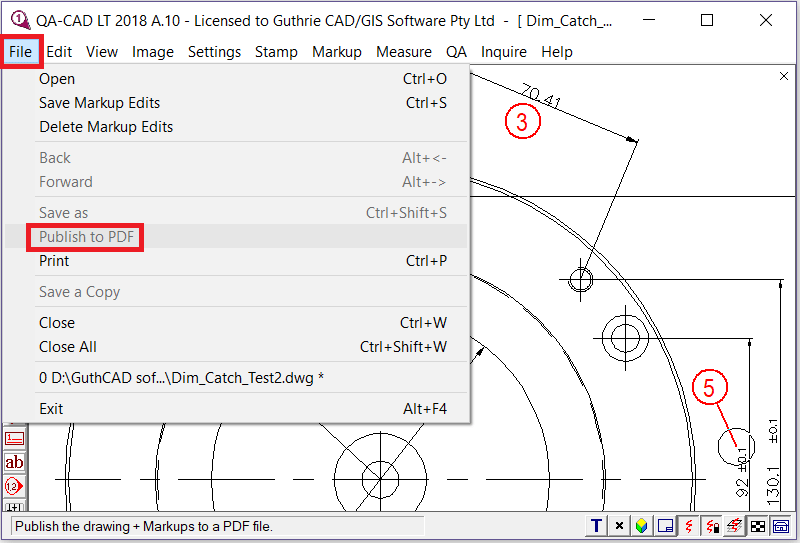
Step 13: Only use 'Save As', or 'Publish to PDF' on the delivery drawing, and save this drawing to a different name than the work drawing. Both of these commands save the drawing to a drawing is un-editable. But you still have the original drawing which remains editable.
(✓: Support, ✖: Not support)
| QA-CAD standard license |
QA-CAD network license |
|
| Balloon and extract PDF, TIFF, and CAD files | ✓ |
✓ |
| Auto ballooning for PDF, images, and DWG / DXF | ✓ |
✓ |
| Create EN9102 FAI, PPAP and custom inspection reports | ✓ |
✓ |
| Publish EN9102 FAI reports to Excel or Word files | ✓ |
✓ |
| Free training & technical support | ✓ |
✓ |
| One time fee for a perpetual license | ✓ |
✓ |
| Network license (Concurrent user license) | ✖ |
✓ |