Easy step-by-step guide: how to create a PPAP form in our quick & easy PPAP software

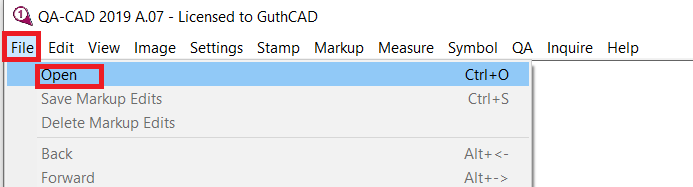
Step 1: Open your PDF drawing file in QA-CAD. Select File > Open
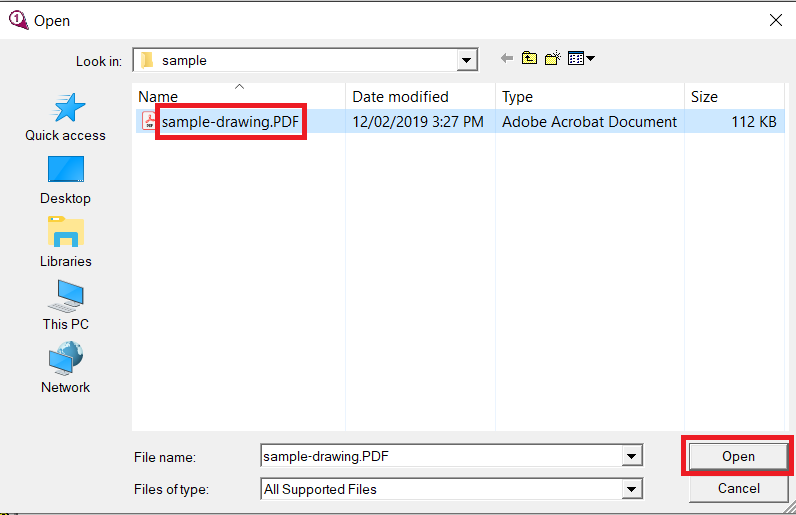
Step 2: Select your PDF drawing file (or CAD file). Press OK.
Step 3: Select QA > QA settings

If you want to see the drawing with black lines on a white background. Press three toggle buttons at the bottom-right of the software window (as you can see three red rectangles in the below example image). If not, please skip this step.

Step 4: Select 'PPAP example' at both Definition table and EXCEL template. Then Press OK.

Step 5: Select QA > Add QA symbol.

Step 6: Tick Attach Attributes and Capture Dimension Value. Press OK button..

Step 7: Your mouse pointer changes and looks like a circle with a plus sign on the software (as you can see the circle inside the red rectangle in the below image). In this mode, you can draw balloons on the drawing. Move the circle to where you would like to place a balloon and left-click once.

Step 8: Then the circle is placed. You can move the plus sign to a dimension value (or text) you would like to capture (in this example, the plus sign moved towards 3.296). Left-click once again. The target value is captured and displayed in Dimension field on Add/Edit QA Symbol Attribute window. Press OK button (complete one balloon and its attributes setting)

If you can not capture dimension or text as we explained in step8, you need to use OCR, as dimension in your drawing is just image data. Please refer to another tutorial guide: how to use OCR in QA-CAD. Please click here to view the guide.
Step 9: Repeat from 14 to 15 until you finish placing all balloons.

Step 10: Select QA > Export Attributes.

Step 11: Choose EXCEL and Template 'PPAP example' and Press OK button.

Step 12: Type your EXCEL file name and press Save button. QA-CAD asks 'Would you like to view the saved file?', then press Yes button.

Step 13: EXCEL file with your captured attributes will be open on your EXCEL or spreadsheet software.

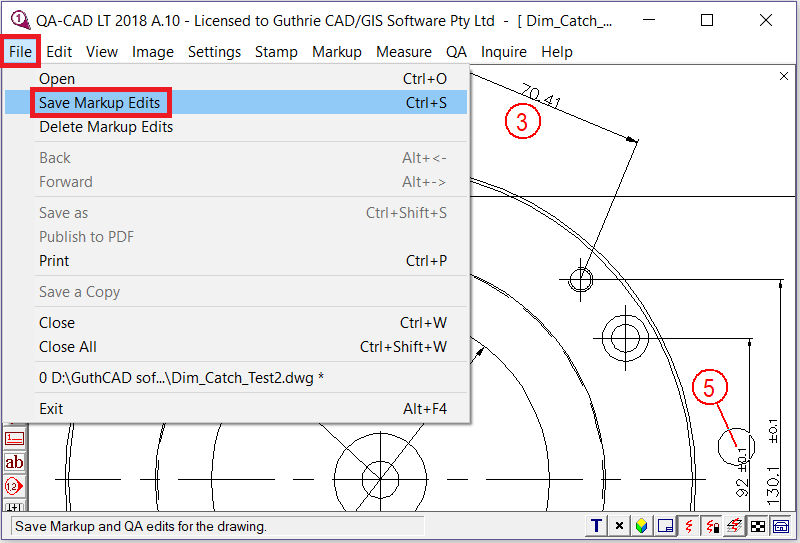
Step 14: Select File > Save Markup Edits to save the work ballooned drawing (This operation generates a CVM file which stores all overlaid balloons and markup information. The original drawing is untouched).
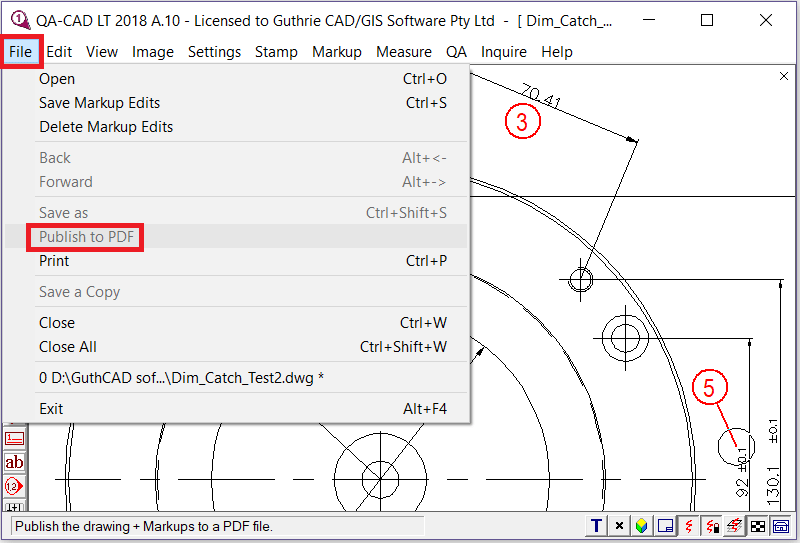
Step 15: Select File > Publish to PDF to save the delivery ballooned drawing.